Blogger Hacks

When your site gets a visitor and finds that one of your sidebar has been pushed below the posts, he’ll consider your site of not a decent quality and you might lose a regular reader

The ready made templates which are available for Bloggers are from the side of some world class designers but when a blogger places an image, video etc. in the middle of the post and the width of the images/video is more than that space provided, in some versions of Web browser, the sidebar tends to drop ,ie, it slips down blog posts this is also known as float drops.

#sidebar-wrapper

{

width: 240px;

float: right;

word-wrap: break-word; /* fix for long text breaking sidebar float in IE */

overflow: hidden; /* fix for long non-text content breaking IE sidebar float */

}

word-wrap:break-word property for fixing long floating text works only in Internet Explorer

Too make your sidebar fixed in one location, add these three CSS properties to the sidebar-wrapper property of your template

#sidebar-wrapper

{

positon:absolute;

magin-top:0px;

margin-left:0px;

}

So now the code looks like this:

#sidebar-wrapper

{

positon:absolute;

magin-top:1px;

margin-left:1px;

width: 240px;

float: right;

word-wrap: break-word; /* fix for long text breaking sidebar float in IE */

overflow: hidden; /* fix for long non-text content breaking IE sidebar float */

}

This confirms to the Web Browser that the sidebar has to remain fixed at one place only in all versions of the Web Browser. The Sidebar will remain static and should not be affected by any long floating image/text/video.

I’m thrilled to tell you that the Blogger team have enabled a comment form below the post – WordPress style! This is probably the feature we ALL wanted added to the Blogger service, so many thanks go out to the Blogger team for enabling this service for us. The inline comment form is currently available through Blogger in Draft. To activate this, go to Settings>Comments in your Blogger dashboard and scroll down to “Comment form placement” where you can check the radio setting for “Embedded below post”.


There is only one problem with this at the moment: those of us who have customized our templates cannot currently use this feature. This is because our templates do not contain the code required to display the comment form. If you use a default template, your comment form should automatically appear below your post once you have changed the comment settings in your blog. I will post about this in full detail in the next couple of hours with instructions for those who have modified their templates.

Update: I have now posted full details for adding comment form functionality to your customized Blogger template, and you can also see this in action beneath this (and every) post on Templates Treasure.

Blogger have developed an inline (embedded) comment form which can be enabled through Blogger in Draft. This is probably the most requested feature for Blogger, and I’m sure many of you will want to use this straight away!

To enable inline comments for your Blogger powered blog, you need to log into your dashboard through Blogger in Draft. Then go to Settings>Comments and scroll down the page to see the new “Comment form placement” setting:

Check the radio setting for “Embedded below post” which will enable the display of the comment form below your blog posts.

If you have customized your template, you will need to make a small change to your template code for this comment form to display. But don’t worry, it’s a very simple customization to make!

Simply go to Layout>Edit HTML in your blog’s dashboard and check the “Expand
widget templates” box. Then search for this section of code:

<p class=’comment-footer’> <b:if cond=’data:post.allowComments’> <a
expr:href=’data:post.addCommentUrl’ expr:onclick=’data:post.addCommentOnclick’><data:postCommentMsg/></a>
</b:if> </p>

Replace this entire section of code with the following instead:

<p class=’comment-footer’> <b:if cond=’data:post.embedCommentForm’> <b:include
data=’post’ name=’comment-form’/> <b:else/> <b:if cond=’data:post.allowComments’>
<a expr:href=’data:post.addCommentUrl’ expr:onclick=’data:post.addCommentOnclick’><data:postCommentMsg/></a>
</b:if> </b:if> </p>

Then save your template. Now when you view a post page in your blog, you should see the new comment form in place! If you don’t see your comment form, make sure you have changed this setting through Blogger in Draft and have added your code in the correct place in your template.

You can see this comment form in action beneath this post. Using this comment
form allows readers to comment using their Google account, OpenID, Name/URL and
all of the settings previously available when using a pop-up or full page
comment form (depending on the settings you have chosen).

I am very happy to see that Blogger have listened to our requests and have added this great functionality to our blogs. There are also some other new features added to Blogger in Draft including an improved posting page and import/export features which you can read about in
the Blogger in Draft blog.

Please let me know what you think of this new feature by leaving your comments
below.

Dear Friend,

Recently, while doing a webpage for my musical idol, one of the suggestions from him was to have a front-page look instead of posts. And here is how it could be done.

1. Go to the Dashboard, and clicking on “Layout”.

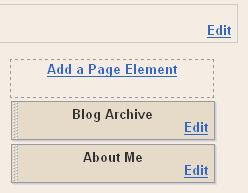
2. On the sidebar, clicking on “Adding New Element”

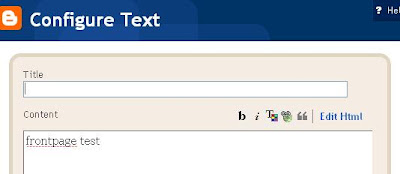
3. Type in something in the content, then save it.

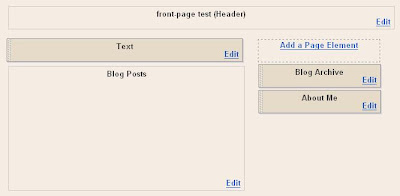
4. Drag the “widget” to the “Blog Post” area.


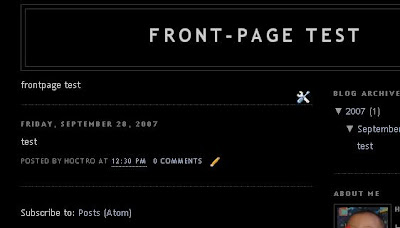
Now the blog would look like this:


It’ll be shown in front of the other posts, whether you are in home page or in any individual posts.

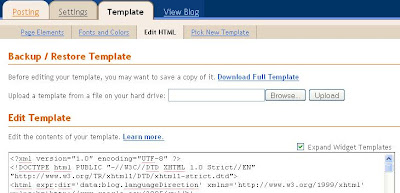
To change this widget such as it’ll show on frontpage only, you need to modify the code by adding two more lines. Go back to Dashboard->Layout, then click on Template->Edit HTML. Also click on the “Expanded Widget Templates”.

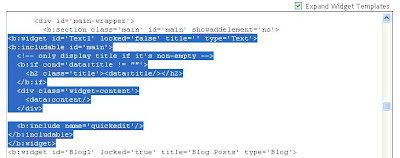
Then look for these lines:

Add these two bold lines as follow:

<b:widget id=”Text1″ locked=”false” title=”” type=”Text”>
<b:includable id=”main”>
<b:if cond=”data:blog.url == data:blog.homepageUrl”>
<!– only display title if it’s non-empty –>
<b:if cond=”data:title != “””>
</b:if></b:if></b:includable></b:widget><h2
class=”title”><data:title></data:title></h2>

<div class=”widget-content”>
<data:content>
</data:content></div>
</b:if>
<b:include name=”quickedit”>
</b:include>

</b:includable>
</b:widget>


From now on, you’ll have a different frontpage than the rest of the blog. Your blog will somewhat functioning like a normal webpage instead of a blog
The advantage of this method is that the text widget can be used effectively so add picture and other texts in “compose mode” to visually make your front page look better.

An example here:

http://hoaamduycuong.blogspot.com

(In this example, I go one step further to label the posts so you could only access the posts through their labels. I also add an “all” label to all of the posts, so the reader could view them all at once.)

First off, what is the Blogger Navbar?
The Blogger Navbar appears by default at the top of every Blogger-powered blog. It is available in several colors, and is configured in the Template tab in Blogger’s interface. If you are using a classic template, you’ll see a menu from which you can select a color. For blogs using Layouts, just click the “edit” link on the Navbar page element. Blogger gives a more detailed explanation of this here.

There are several reasons why I think it’s important to remove the Blogger nav bar but I’ll name my two most important reasons. First one being that it’s an eye sore and makes your blog look less professional. Secondly, when you click on the “next blog” button you never know what type of blog you might stumble upon. There are so many spam blogs with adult content or other information you don’t want young people to read. When you do block the navbar on your own blog, you prevent others from also easily leaving your site and accidentally heading to one of these spam sites.

Unfortunately Blogger doesn’t give you the option to remove the navbar easily but this simple modification to your template allows us to hide it. The good news is that it’s not against Blogger’s TOS so it’s not illegal to do. I read a post recently by Blogger Support that stated

While it’s not officially against our TOS, we discourage folks from removing it because we think it’s a great feature with more improvements to come. Follow the above instructions at your own peril, as Blogger controls the TOS and has been known to change it.

So the change you want to make is to the stylesheet. First make sure you backup your current template just in case you make a mistake. Click on the “Download Full Template” link ( go to “Template” => “Edit HTML”) and save it locally. Next, from within your template code you (don’t need to scroll down for it) add this code:

#navbar, #navbar-iframe {
height: 0px;
visibility: hidden;
display: none;
}

After that, save your template and view your blog. The top Blogger navbar should have disappeared! Looks much better now doesn’t it? If you ever want to add the navbar back, it’s simple. Just remove the line of code we just added. Also, if you ever switch templates, make sure to follow these instructions again because it needs to be done with each new template you use.

1234567


whos.amung.us