Background Image for Blogger Template

With this guide, you would be able to add a background image or picture to your Blog, customize the position of your image, and have a static background image that stays in place when you scroll through the contents of your blog.

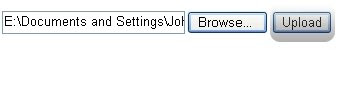
You will need to create an image. Find a picture you like. If you need a free photo editing tool, you can either search the net for one or use Google’s Photo Editing Software Picasa. You can also use a small tile-size image which can be repeated so as to cover the entire page. Try not to have an image file that is too large as your page may take a little longer to load.


After creating a picture, you will need to upload it onto a free picture host. You can read about using free hosts like Google Page Creator and Google Groups. We have also a rather comprehensive list of free Image Hosts and File Hosting Services in our article on Manage Blogger Image Storage Space. Check out those sites and choose one that is fast, reliable and enables hotlinking to the uploaded files. Take note of the picture URL.

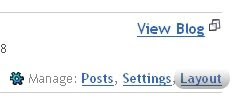
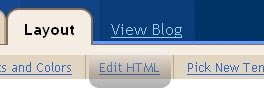
Next, log in to your dashboard layout; under Template -> Edit HTML, scroll to where you see this:-

body {
background:$bgcolor;

Change background color

If you would like to change the background color of your blog to a very unique color, you can manually specify the color value. Search online for color codes, or take a look at the HTML Color Chart to see if you can find your desired color. For example, if you have chosen a color code #B38481, change the above code to this:-

body {
background-color:#B38481;

If you are changing the background color of your sidebar only, add the color code under the relevant sidebar heading.

#sidebar-wrapper {
background-color:#B38481;

Similarly, if you want a different color for your main post column, add the color code as follows:-

#main-wrapper {
background-color:#B38481;

Note that different templates may label their stylesheets differently. The #sidebar-wrapper may be called #side-wrap or something to that effect.

Add a background image

The code to insert is this:-

body {
background-image: url(URL address of your image);

Remember to insert the URL address of your image in the brackets. If you would like to have a feel of how a background picture will look like, I have uploaded a test image at this address – http://i154.photobucket.com/albums/s255/ownlblog/narutosasuke1024x768.jpg

Insert the URL of this test image into the above brackets and Preview your blog.

You can also have a background image just for your sidebar. Locate the style and add the background image code accordingly.

#sidebar-wrapper {
background-image: url(URL address of your image);

For a background image to your main post body only, add the code here:-

#main-wrapper {
background-image: url(URL address of your image);

Repeat background image

By default, the image is repeated to fill up the entire background of the page. If you have a small or tile-sized image, it will appear like a print pattern in the background. Sometimes, you may choose not to have the image repeated. If that is the case, you can insert this code:-

background-repeat: no-repeat;

Alternatively, you may only want the image to be repeated horizontally. The code is this:-

background-repeat: repeat-x;

To have the image repeated vertically, the code is this:-

background-repeat: repeat-y;

Position background image

If you have an image that is not repeated, you may like to specify the exact position of this image on your page. The HTML code to be inserted is this:-

background-position: top left;

Your image will appear at the top left corner of your page. The other possible values that you can use to replace “top left” are:-

top center;
top right;
center left;
center center;
center right;
bottom left;
bottom center;
bottom right;

If you do not want it entirely left, right or center, you can also define the horizontal and vertical alignments either in percentage or in pixels. Use either of these values instead, with x being the horizontal value and y being the vertical value.

Static background image

After that, you may specify whether you want your background image to remain in a fixed position when the contents of your blog are scrolled. By default, the picture scrolls with your content. To have it stay put, the code to insert is this:-

background-attachment: fixed;

Putting it all together

The eventual CSS code that you will have for your customized template may look like this:-

body {
background-color:#B38481;
background-image: url(http://i154.photobucket.com/albums/s255/ownlblog/narutosasuke1024x768.jpg);
background-repeat: no-repeat;
background-position: center center;
background-attachment: fixed;

You can also combine the attributes into one line and the shorthand code will look like this:-

body {
background:#B38481 url(http://i154.photobucket.com/albums/s255/ownlblog/narutosasuke1024x768.jpg) no-repeat center center fixed;

Putting the above code into my blog, this is what you would see.

Background Image for Blogger Template

Of course, after having added the background image, you will need to adjust the colors of your text so that they stand out against the backdrop. Go to Template -> Fonts and Colors to do that.

How to add a favicon to your blog

A favicon, also known as shortcut icon, website icon, page icon or urlicon is a small, square icon, usually 16×16px in size, that is displayed alongside the URL in the web address bar of a web browser.

The reason for using a favicon is branding. Most modern web browsers allow tabbed browsing. This means that a user can open several websites in the same browser window. A nice favicon design will distinguish your blog / website from the other websites.

Some modern browsers also allow favicons to be displayed in the Bookmarks section. Again, this will ensure your website will be distinguished from the others.

Favicon formats

The most widely used favicon format is .ico. Other favicon formats used are .gif and .png. You can also add an animated gif as a favicon, but this is currently only supported by Mozilla Firefox. Even though this is only supported by Firefox, there is the possibility of using multiple favicons. For example you can use an animated one which will display in Firefox and a static one which will display in the rest of the browsers.

Favicon Design

A favicon has a 16×16px size so to design it it’s advisable to use a larger size such as 128×128px and then scale it to 16×16px

To get the favicon on your blogger, you need a code to add to your template, and this is it:

<link rel=”shortcut icon” href=”http://myfavicon.com/favicon.ico” />

<link rel=”icon” href=”http://myfavicon.com/favicon.ico” />

Replace “http://myfavicon.com/favicon.ico” with the URL of where your webspace stored your ico file, & paste the code between the head tags of your blog. The favicon will now appear in most browsers address bar and bookmarks. (Not sure about the rhyme or reasoning here, but some do…some don’t.) Added bonus! If you use Mozilla Firefox (why wouldn’t you?) it will also show up on the tabs!!!!

Guidelines

  • The link elements must be inside the head element in the HTML.
  • Use the appropriate resolution and color depth : ICO – include multiple resolutions (the most commonly used being 16×16 and 32×32, with 64×64 and 128×128 sometimes used by Mac OS X) and bit-depths ; GIF – use 16×16 in 256 colors ; PNG – use 16×16 in either 256 colors or 24-bit.
  • For XHTML, the link element must be terminated by ” />” instead of “>”.
  • The .ico file format will be read correctly by all browsers that can display favicons.

Favicon Inspiration

How to install Blogger Templates

Everyday so many people while chatting on yahoo asks “How to install xml blogger templates?”.
So, to make it easier for you, here is the complete tutorial on how to install blogger templates…

1.First download the template and unzip the file using winrar or winzip. After extracting the file you will mostly see two folders named Images(incase if you lost) and an xml file.

2.Now, sign in to Blogger dashboard and click on the layout.

3.Here is the important step, after uploading any new Blogger template, all of the previous widgets like your google adsense ads,text,profile,poll,etc etc will be lost.
So, to avoid this to happen, in this step click on ‘edit’ on all the widgets and copy the codes into notepad,etc.

4.Next, click on the ‘Edit html’ tab

5.You’ll see an option to download the current template, so do it!

6.Just below that,there’s an option of uploading new template.So, use the Browse button and upload the downloaded xml file(which we discussed in step 1).

7.Now, a message appear saying that your widgets are about to be deleted.Click on the Confirm & Save (no problem doing this because we already copied the widget codes in Step 3).

Now you successfully installed the template 🙂
Click on the ‘Page elements’ page now and add the codes that you copied in step3 using the ‘Add a Page Element’ option.

Note:The *Images(incase if you lost)* folder contains all the image files used in the template.Due to lack of bandwidth since many users are using the same template in , you may see images not loading in your sites.So, For this not to happen, Upload all the images to your own server..
Doing this is very simple, Click on the ‘Edit html’ and go through the template code and replace all the image links(starts with http and ends with .jpg or .gif or .png) with the direct image links you got after uploading the images to any Free image hosting service like photobucket,etc.Or Just Read Our Article ‘Manage Blogger Image Storage Space. and SAVE THE CHANGES.

Hope That Must Have helped You..Don’t Forget to Comment.

How to Highlight Author Comments

Highlighting author comments using a different background color, border or different style of text helps readers understand when you have personally posted a response.

So far, “How to Highlight Author Comments” has been the most requested article in my Skribit widget, so in this post I’ll explain how you can change comments which you have posted yourself to distinguish these from other comments on your posts.

The main obstacle I’ve faced in writing up this article so far is that different Blogger templates code the comments section differently.

While the easiest method for me to write would have been to say “Find this code and replace it with this”, such a method would only be usable by bloggers whose template matches the code.

Instead, my explanation may be a little more complicated than usual, though I hope this explanation will ensure anyone using a Blogger template will understand how to implement the highlighted author comments hack!

Backup your Blogger Template!

Before even attempting to customize your Blogger template, the first thing you should do is back up your template. This ensures you can easily restore your original template if something goes wrong. Also, as most of us cannot see comments unless we are viewing a post page, it would be impossible to see if code changes have adversely affected the comments section.

To make a backup of your Blogger template, simply go to Layout>Edit HTML in your Blogger dashboard, and click on the “Download Full Template” link. This will save your existing template as an XML file which you could use to restore your blog, just in case 🙂

Finding the Comments Block in your Blogger Template

The first thing we need to do in order to implement this hack is to locate the “comments block” within your Blogger template.

To find the comments section, you will need to tick the “expand widget templates” box as this code is contained within your main “Blog Posts” widget.

As I’ve already pointed out, the section of code used to display comments varies in different templates, so in order to find this section, you may need to search for some specific tags rather than complete sections of code.

To give you an idea of what you are searching for, here is the complete comments-block code from the Minima template:

<dl id=’comments-block’>
<b:loop values=’data:post.comments’ var=’comment’>
<dt class=’comment-author’ expr:id=’data:comment.anchorName’>
<a expr:name=’data:comment.anchorName’/>
<b:if cond=’data:comment.authorUrl’>
<a expr:href=’data:comment.authorUrl’ rel=’nofollow’><data:comment.author/></a>
<b:else/>
<data:comment.author/>
</b:if>
<data:commentPostedByMsg/>
</dt>
<dd class=’comment-body’>
<b:if cond=’data:comment.isDeleted’>
<span class=’deleted-comment’><data:comment.body/></span>
<b:else/>
<p><data:comment.body/></p>
</b:if>
</dd>
<dd class=’comment-footer’>
<span class=’comment-timestamp’>
<a expr:href=’data:comment.url’ title=’comment permalink’>
<data:comment.timestamp/>
</a>
<b:include data=’comment’ name=’commentDeleteIcon’/>
</span>
</dd>
</b:loop>
</dl>

If you are using Minima (or a similar template) you should be able to locate this section of code easily. However, some templates use <ul> and <li> instead of <dl> and <dd> tags, in which case the code you are looking for may look more like the section on this page instead, or could even be wrapped in simple

tags.

If you are having trouble locating the comments section in your blog’s HTML code, do a CTRL+F (or CMD+F for Mac users) search within your template code for the following template tags:

* <b:loop values=’data:post.comments’ var=’comment’>
* <data:comment.author/>
* <data:comment.body/>

The comments section of your blog’s HTML code should contain all three of these template tags. Simply locate these tags and the surrounding code in your template, then work out where this section begins and ends using your discretion.

Generally speaking, this section will usually begin with

or

    or

    and end with a matching closing tag.

    Changing the comments code to add author highlighting

    Once you have located your comments section in your blog’s HTML code, you will need to highlight this entire section of code and replace it with the following section of code instead:

    <ul class=’commentlist’ style=’margin: 0; padding: 0;’>
    <b:loop values=’data:post.comments’ var=’comment’>
    <b:if cond=’data:comment.author == data:post.author’>

    <li class=’author-comments’ style=’margin: 0 0 10px 0;’>
    <b:if cond=’data:post.dateHeader’>
    <div class=’commentcount’/>
    </b:if>
    <cite>
    <b:if cond=’data:comment.authorUrl’>
    <a expr:href=’data:comment.authorUrl’><data:comment.author/></a>
    <b:else/>
    <data:comment.author/>
    </b:if>
    </cite>
    <br/>
    <div style=’clear: both;’/>
    <b:include data=’comment’ name=’commentDeleteIcon’/>
    <p><data:comment.body/></p>
    <div class=’commentlink-date’><a class=’commentlink’ expr:href='”#comment-” + data:comment.id’ title=’comment permalink’>
    <data:comment.timestamp/>
    </a></div>

    <div class=’clear’/>

    </li>

    <b:else/>

    <li class=’general-comments’ style=’margin: 0 0 10px 0;’>
    <b:if cond=’data:post.dateHeader’>
    <div class=’commentcount’/>
    </b:if>
    <cite>
    <b:if cond=’data:comment.authorUrl’>
    <a expr:href=’data:comment.authorUrl’><data:comment.author/></a>
    <b:else/>
    <data:comment.author/>
    </b:if>
    </cite>
    <br/>
    <div style=’clear: both;’/>
    <b:include data=’comment’ name=’commentDeleteIcon’/>
    <p><data:comment.body/></p>
    <div class=’commentlink-date’><a class=’commentlink’ expr:href='”#comment-” + data:comment.id’ title=’comment permalink’>

    <data:comment.timestamp/>
    </a></div>
    <div class=’clear’/>
    </li>

    </b:if>
    </b:loop>
    </ul>

    The simplest way to change your comment code is to follow these steps:

    1. Copy the code above to your clipboard
    2. Highlight the entire section of your comment code in your Blogger template
    3. Paste the code from your clipboard in place of the existing code by keying CTRL+V (or CMD+V).

    One quick method to check if you have made code errors is to preview your template. If you have accidentally omitted some code, you will receive an error message. In this case, you should press the “clear edits” button and begin again.

    If you don’t get an error message, you can then proceed to save your template.

    Adding style for author comments

    At this stage, your own comments will still appear in the same style as other comments. To highlight author comments, we need to add some style code to your blog template.

    This step is much easier than locating and changing the comment section. Simply locate the closing tag in your Blogger template, and immedietly before this, paste the following section of code:

    .author-comments {
    background: #cccccc;
    border: 1px solid #333333;
    padding: 5px;
    }

    If you prefer, you can change the hex colors (#cccccc and #333333) to match the color scheme of your own template (discover the color codes for your preferred schemes using the web color calculator).

    Then save your template.

    Now when you make a comment on your blog while signed in to your Blogger account, your comments will have a different border and background color to comments posted by your readers.


How To Add Star Ratings to your Blogger Blog

Star ratings is a new feature currently available through Blogger in Draft. This enables you to add a widget beneath your posts which readers can use to rate your articles on a scale of 1-5, like this:

If you use a default Blogger template, you should be able to activate this feature right away when logged through Blogger in Draft: simply go to Layout>Page Elements and edit the “Blog Posts” widget to activate the display.

However, those using a customized or third party template will need to add the required code to their templates first. In this tutorial, I’ll explain how you can add “star-rating” functionality to your customized Blogger template.

To use the “star ratings” feature, you will first need to activate this through Blogger in Draft (it’s still in beta, and not yet available for use in the regular Blogger dashboard).

Log into Blogger in Draft and choose the blog you wish to work with. Then go to Layout>Page Elements, and click the “Edit” link on the “Blog posts” widget.

This screen offers many options for you to add (or remove) from the posts section of your blog. If you scroll down a little, you’ll see the “star ratings” option. Tick this option to activate this setting for your blog, then scroll down to save your settings.

If you are using a default template, you should see the star ratings widget appear on the post pages of your blog. However, if you have customized your template (or are using a third party template), it is likely that your template does not include the code required to make the star ratings display.

Here is how you can add the required code for star ratings to your non-standard Blogger template

Step 1: Backup your existing template. I assume you know it very well so I am not gonna explain it again.

Step 2: Expand widget templates and copy the entire code some where in Notepad or something. In case something goes wrong, you have the entire widget code.

*Step 3: Go to ‘Layouts’ and under ‘Blog post’ widget, select Star rating. And save the changes.

*Step 4: Go to ‘Edit HTML’ and select ‘Expand widget templates’.

Step 5: Search for this line of code:

<p><data:post.body/></p>

Step 6: Copy the following code right after the above line of code:

Click here For The Code!

Step 7: Now again search for following code:

<b:include name=’feedLinks’/>

This line you may find several times, so make sure you seek for the last instance at the bottom of the code which should ideally be before the start of sidebar codes. So when you see this line, it should look something like:

<b:include name=’feedLinks’/>

  </div>

            </div>

        <div class=’cont-bottom’/>

        </div>

        </div>

        </div>

 </b:includable>

</b:widget>

</b:section>

….

….

<div id=’sidebars’>

Step 8: Copy the following code right after the line mentioned above:

<b:if cond=’data:top.showStars’>

    <script src=’http://www.google.com/jsapi’ type=’text/javascript’/>

    <script type=’text/javascript’>

      google.load(&quot;annotations&quot;, &quot;1&quot;);

      function initialize() {

        google.annotations.setApplicationId(<data:top.blogspotReviews/>);

        google.annotations.createAll();

        google.annotations.fetch();

      }

      google.setOnLoadCallback(initialize);

    </script>

  </b:if>

Step 9:Preview your changes without saving it. You should see the star rating in each post on your blog posts on the main page itself.

Step 10: That’s it, save your template if satisfied and enjoy the Star ratings on your blog.

Also let me know if this post helped you in customising your template by dropping a comment here or at least leaving your rating.